From Version 10.6, installation is performed in three parts:
Installs tenant instances of all applications except Softdial Telephony Gateway™.
- Softdial CallGem™ (Predictive Dialing Engine and Softdial Command and Control)
- Softdial Campaign Manager™
- Softdial Scripter™ 2
- Workflow Server (used to facilitate agent, campaign and script configuration)
- Scheduler
- Publisher (Primary and Secondary services, marshalls historical and real time reporting data )
- Softdial Reporter™ 2 (Not installed as standard from V10.6)
- Softdial Reporter™ Web (Replaces Reporter 2 from V10.6)
- Recording Server (Not installed as standard from V10.5)
- Softdial Recording Monitor™ (Replaces Recording Server from V10.5)
- Namespace Server
- Control Center
From version 10.3 the Softdial Web Service suite is also installed. New services are regularly being added to this suite - as of V10.4 the following web services and clients are available.
- Softdial Web Server
- Softdial MariaDB Database
- Http SDMP Bridge (bridges web services to CallGem)
- Softdial Campaign Manager™ Web Client
- Softdial Recording Monitor™ Web Client
- Tenant Provisioning Service
- List Import / Export Service
Installs Softdial Telephony Gateway™ and Control Center. See STG
Used by Softdial Reporter™ Web and must be installed on a separate server from the Application server and Telephony server.
- Extract the zipped archive MongoDBSetup64-10.6.XXX.zip
- In the resulting folder (Fig. 1), double click the application (not the Windows Installer Package)

- At the Welcome screen (Fig. 2), click Next

- At the End User License Agreement screen (Fig. 3), check the box to accept the terms, and click Next

- At the Custom Setup screen (Fig. 4), accept the defaults, and click Next

- At the Destination Folder screen (Fig. 5), accept the defaults, and click Next

- At the Ready to Install screen (Fig. 6), type a password*, type it again to confirm, and click Install

* Password:
1) This may include any characters except / \ : * ? " < > & % ! ' ;
2) Make a note of your password, as you will need it when installing Softdial Contact Center™ - Installation of MongoDB usually takes less than 10 seconds. At the Completed screen (Fig. 7), click Finish


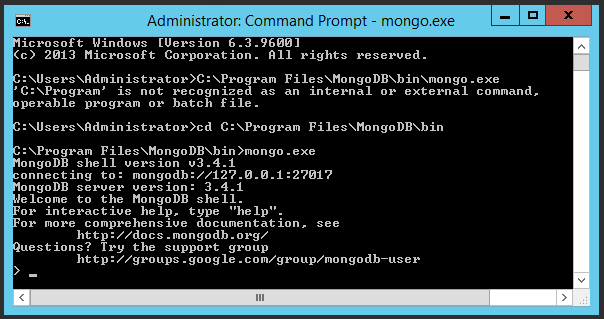
- In a Command Prompt, type cd <MongoDB install directory>\bin (by default, this will be cd C:\Program Files\MongoDB\bin), and hit Enter.
- Type mongo.exe, and hit Enter. The MongoDB shell application will connect to the default MongoDB instance running on the localhost interface on port 27017. On successful connection, messages will be displayed as shown in Fig. 8

For more info on working with the MongoDB shell, see the mongodb documentation
From Softdial Contact Center™ Version 10.3, the software is installed with the standard Microsoft Installer technology (was previously using the WISE installer).
If you do not have Microsoft .NET V3.5 or later installed, the installer will install this before proceeding with the Softdial Contact Center™ installation.
If, after installing / updating .NET, the server recycles, you may see the following error:

Fig. 9 - Installation Error - Cant read from file
This issue can also occur if the installation is cancelled before it is complete.
To recover, delete the .msi file for the previous version and re-run the installer.
The Installation Procedure
The installer software is in two parts:
- Application
- Windows Installer Package

Fig. 10 - Installation Files
To start the installation, run the installer Application.
SCC requires the Microsoft Visual C++ 2008 Redistributable. If your server does not already have this installed, it will now be installed.

Click Next

Check the box to accept the license terms, and click Install

The required files are installed.

Click Finish to complete this section.


Fig. 11 - Welcome Screen
Click Next

Fig. 12 - End-User License Agreement
Accept the License agreement and click Next

Fig. 13 - Destination Folder
In this screen you will select where to install the software and the log files. Normally the Softdial Contact Center™ Suite will be installed in C:\Softdial\ and we recommend that the Logs are installed on a separate volume such as E:\Logs. The Logs directory default setting is C:\Logs. Unless you are only installing for test or demo, change this to point to another available volume with plenty of free space (e.g. 500GB).
Click Next

Fig. 14 - Choose Setup Type
The installer has been configured to provide three types of installation:
- Typical is used where web services are not required e.g. for legacy installations. This option installs all services except those that require the Apache server (e.g. Web CM Client, List Import, Tenant Provisioning).
- Custom allows the user to select only the required services - this would normally be used to create or update an existing installation e.g one using just Softdial CallGem™, Softdial Campaign Manager™ while retaining legacy Scripting / Reporting tools and configuration.
- Complete is the normal option for new installations. This installs all available services including the Apache Webserver, HttpSDMPBridge and NetBridge.
If you select the Complete installation, V10.3 is installed with a MYSQL database pre-configured to provide historical reporting out of the box. This is intended for demo and test purposes only. We strongly recommend using a proprietary SQL database such as MSSQL server or Oracle for production. The production reporting database should also be installed on a separate server from Softdial Contact Center™.
Select the required installation type and click Next. For the purposes of this tutorial we have selected a Complete installation.
If you are installing Softdial Contact Center™ as part of a CATI based Market Research deployment, use the Custom option and select only the Softdial CallGem™ application to install.

Fig. 15 - Market Research Custom Setup
You are now ready to start the installation.

Fig. 16 - Ready to Install
Click Install to begin.
If your install configuration requires the Apache webserver (e.g. you have selected a Complete install or a Custom install with this option), port 80 must be free as the Apache webserver is configured to use this port. If you are upgrading from a previous version with Softdial Scripter™ 2, or if you are running IIS on the server you may have to reconfigure these to use a port other than port 80. If port 80 is not available you will see the following alert:

Fig. 17 - Port 80 Alert
If you see the above alert, click OK to terminate the installer and make the necessary port 80 configuration changes.

Fig. 18 - Users Configuration
Enter secure passwords and click Next.

Fig. 19 - Dialer Configuration
In order to create a unique license serial number for this system, the setup process needs to know which Network Interface Card (NIC) to use. Select from the drop down list of NICs available on your server and click Next.
The installer will now start to install and configure the selected applications.

Fig. 20 - Installing

Fig. 21 - Completed
When the installer has completed, click Finish.
If you have upgraded an existing installation you will be asked to restart the server; otherwise you will be presented with server connection dialogs for the Softdial Alert Monitor and the License Monitor.
Normally you will enter localhost in both if you are connecting to Softdial CallGem™ on the same server.

Fig. 22 - Dialer Server

Fig. 23 - Softdial Alert Monitor
If you do not already have a license installed you may see an Invalid License alert in the Alert Monitor.
Softdial Contact Center™ can be run in full demo mode with up to 5 agents and 4 campaigns without a license.

Fig. 24 - License Monitor
After completing the installation (and restart if required), check that all the services are running in the Service Status window.
Fig. 25 shows the services that are installed with a Complete install. If you have selected a partial installation with either the Custom or Typical buttons, you will see a subset of these services.

If any services are not started, first try to update the service status window by clicking the refresh button  .
.

Fig. 26 - Service Status 2
If any services still show as being stopped, try starting them by selecting each service in turn and clicking the single service start button  .
.
Otherwise, restart all services using the restart all button  .
.